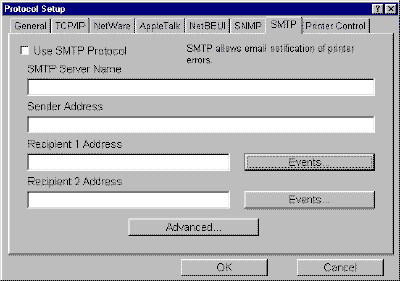
The IB-2x can send email notification of printer events and errors using SMTP to up to two email addresses.
When using SMTP notification, make sure that:
Configure the IB-2x SMTP parameters using AdminManager.

SMTP Server Name The name or IP address of the SMTP server. If you use the name, rather than the IP address, the DNS server address must be configured on the TCP/IP tab. See Assigning a DNS Server below. Sender Address The sender address that will appear as the sender in the email sent by the IB-2x. This will usually be the email address of the network administrator. Recipient Address 1 (2) The email address of the recipient of email notifications sent by the IB-2x. You can specify up to two recipients. Events See below. Advanced See below.
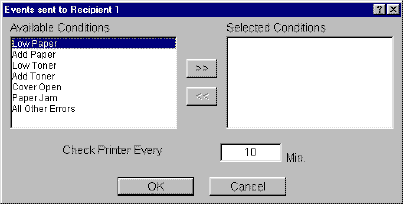
Available Conditions Highlight the events which will cause a notification email to be generated, then click to select.
Check Printer Every ... The interval in minutes that the IB-2x will wait before checking to see if one or more of the selected notification conditions has occurred. If a notification condition exists, an email will be send to the recipient(s) configured above. The default is 10 minutes.
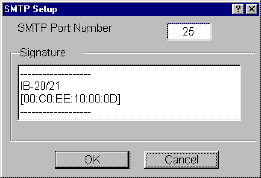
SMTP Port Number The port number for the SMTP server. '25' is the default port number for SMTP. Signature If desired, edit the signature that is appended to the end of the email notifications. The signature is used to identify the IB-2x which generated the email.
DNS (Domain Name System) is a set of protocols and services on a TCP/IP network which allows the use of user-friendly names rather than IP addresses.
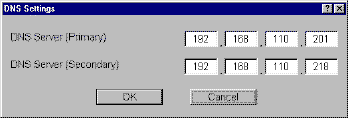
If you entered the SMTP server by name rather than by IP address, you must also assign the DNS server address using the following procedure.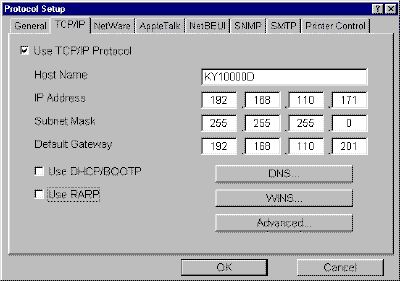
In the DNS Settings window, enter the primary DNS Server address, e.g. '192.168.110.201;' and the secondary DNS Server address, e.g. '192.168.110.218,' if any.
