Windows NT 4.0 Printing
This section explains how to install the IB-2x as an LPR printer in the Windows
NT 4.0 environment.
This section covers:
Verifying Windows NT 4.0
Required TCP/IP Components
The following steps describe how to check for and, if
necessary, add the Windows TCP/IP components which are necessary for LPR
printing under Windows NT 4.0 environment.
- Select Windows NT 4.0 Start>Settings>Control
Panel.
- Double click Network.
- Click the Protocols tab.
Check for TCP/IP Protocol
in the list of Network Protocols. If not present, click Add to install
it from the Windows NT installation CD.
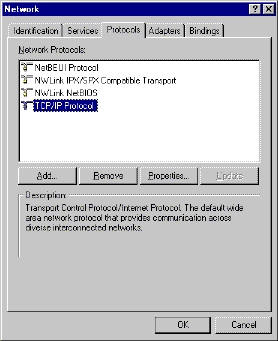
Figure 1. TCP/IP Protocols
- Click the Services tab.
If Microsoft
TCP/IP Printing and Simple TCP/IP Services are not in the list of Network
Services, click on Add to install them.
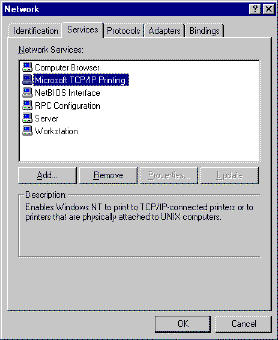
Figure 2. Microsoft TCP/IP Printing Service
-
Click on OK when all protocols and
services have been added. If the TCP/IP protocol has been added, Windows
will prompt for the IP address and other TCP/IP parameters. The new
protocols and services will not be available until the system is restarted.
 |
Microsoft recommends re-applying the current
Service Pack after adding any new protocols or services. Follow
Microsoft’s precautions for Service Pack installation, such as having a
current system backup. |
Configuring
the IB-2x IP address
See IP
Address Configuration.
Configuring the LPR port
for Windows NT 4.0
- See Installing the
Windows 95/98 and NT 4.0 Printer Drivers and install the printer driver as a local
printer.
- Select Windows NT 4.0 Start>Settings>Printers.
- Right click the printer you have just installed and
open its Properties.
- Click the Ports tab (below).
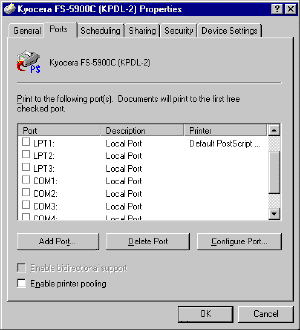
Figure 3. The Printer Properties Ports
Tab
- Click Add Port. The Printer Ports
window (below) will open.
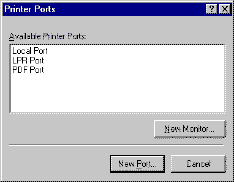
Figure 4. Printer Ports Windows
- In Figure 4, click LPR Port.
- Click New Port. The Add LPR compatible
printer window (below) will open.

Figure 5. Entering the IP Address and name
- In the Name or address of server providing lpd field, enter the
IB-2x IP address.
- In the Name of printer queue on that server field, enter any
desired port name, e.g. LPR1, and click OK.
- Click OK to return to the Ports tab. The new port
now appears in the list (below).
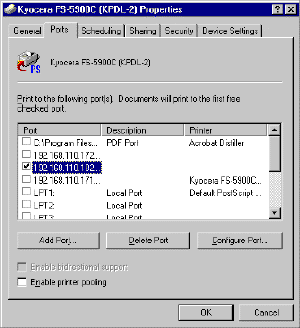
Figure 6. The port successfully added
- Click OK. The printer driver is now configured to send all
print jobs to the IB-2x LPR port.
Sharing the Printer
If the printer is to be shared:
- Click the Sharing tab in Figure 6.
above.
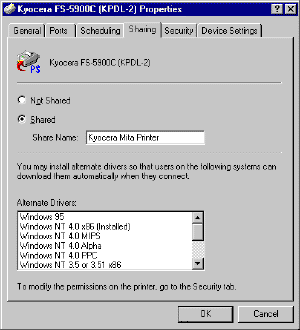
Figure 7. Sharing the Printer
- Select Shared and enter the desired Share
Name.
- Selecting other Windows versions in the Alternate
Drivers list causes the driver to be automatically installed when a
user connects to this share.


